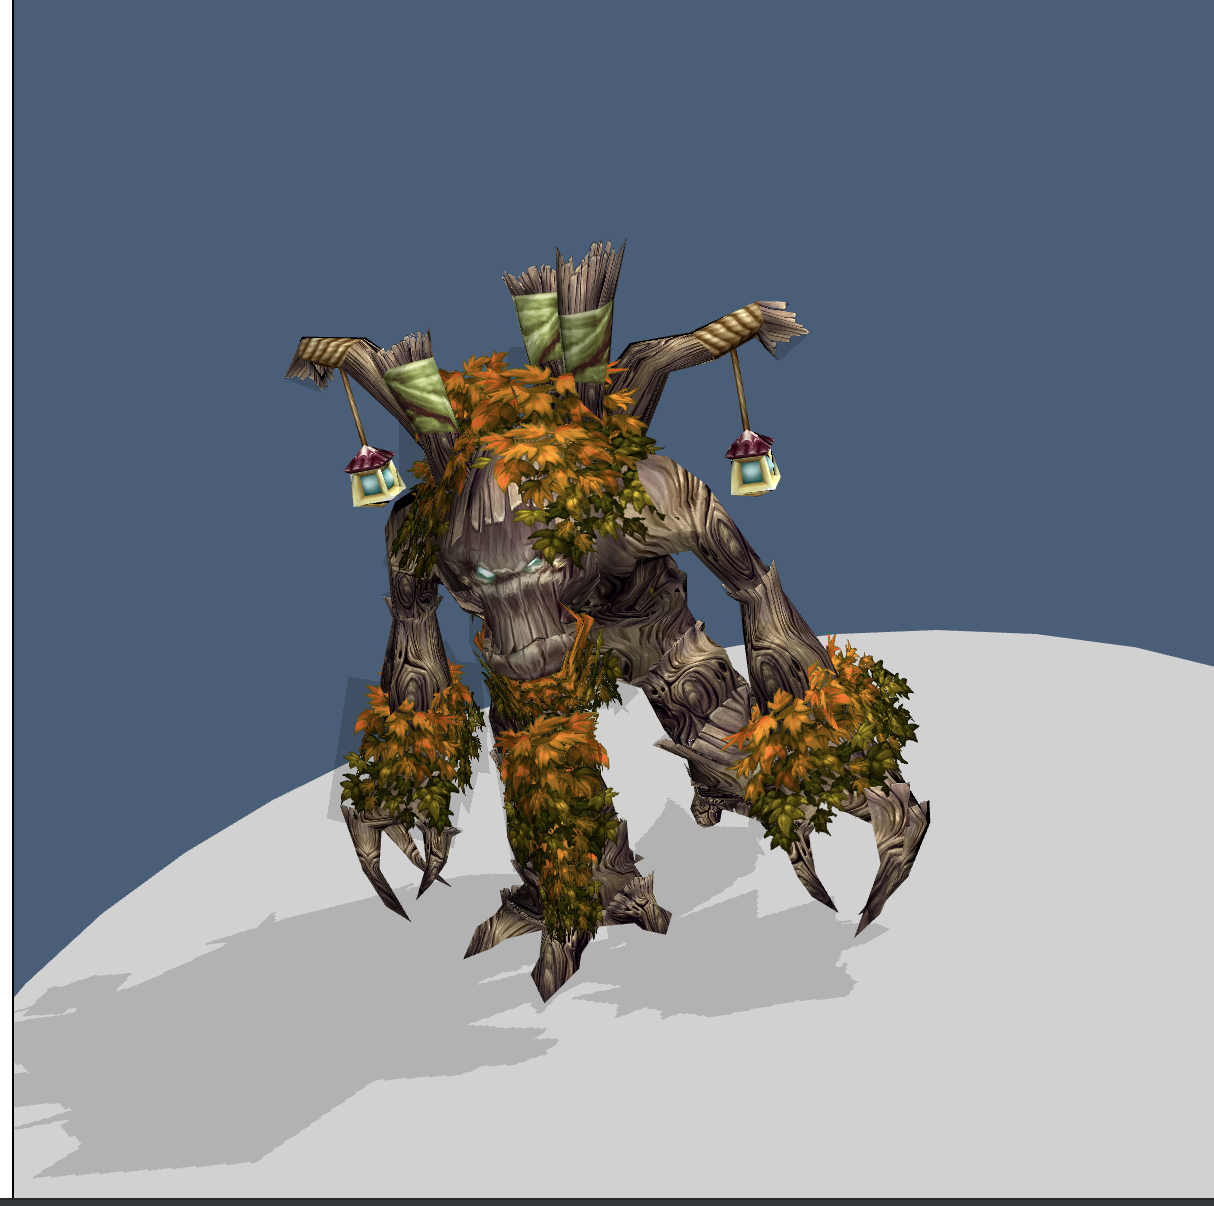
http://localhost:8000/wow/index.xhtml
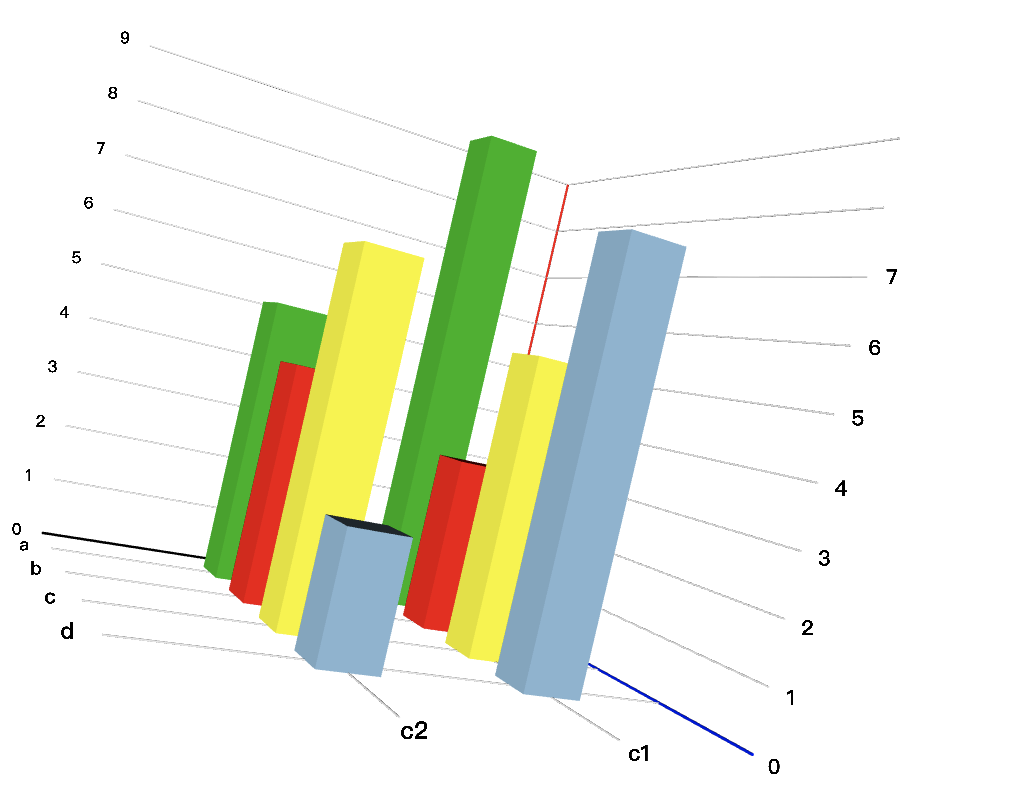
http://localhost:8000/x3d-chart/
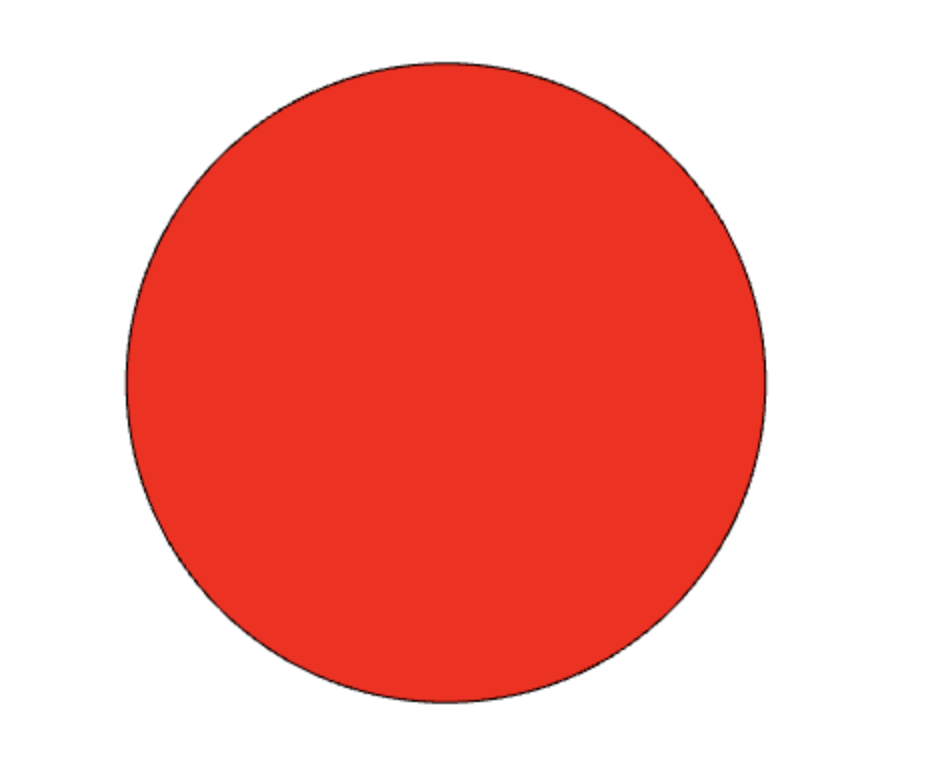
首先我们尝试绘制这样一个圆:
传统的web 3d的基本方案:webgl
<html style="height: 100%; width: 100%">
  <body style="height: 100%; width: 100%; margin: 0px">
    <canvas id="my-canvas" style="height: 100%; width: 100%; display: block"></canvas>
    <script>
      const canvas = document.getElementById("my-canvas");
      const context = canvas.getContext("webgl");

      const redColor = new Float32Array([1.0, 0.0, 0.0, 1.0]);
      const blackColor = new Float32Array([0.0, 0.0, 0.0, 1.0]);

      // Use an orthogonal projection matrix as we're rendering in 2D.
      const projectionMatrix = new Float32Array([
        1.0, 0.0, 0.0, 0.0,
        0.0, 1.0, 0.0, 0.0,
        0.0, 0.0, 0.0, 0.0,
        0.0, 0.0, 0.0, 1.0,
      ]);

      // Define positions of the vertices of the circle (in clip space).
      const radius = 0.5;
      const segmentCount = 360;
      const positions = [0.0, 0.0];
      for (let i = 0; i < segmentCount + 1; i++) {
        positions.push(radius * Math.sin(2 * Math.PI * i / segmentCount));
        positions.push(radius * Math.cos(2 * Math.PI * i / segmentCount));
      }

      const positionBuffer = context.createBuffer();
      context.bindBuffer(context.ARRAY_BUFFER, positionBuffer);
      context.bufferData(context.ARRAY_BUFFER, new Float32Array(positions), context.STATIC_DRAW);

      // Create shaders and program.
      const vertexShader = context.createShader(context.VERTEX_SHADER);
      context.shaderSource(vertexShader, `
        attribute vec4 position;
        uniform mat4 projection;

        void main() {
          gl_Position = projection * position;
        }
      `);
      context.compileShader(vertexShader);

      const fragmentShader = context.createShader(context.FRAGMENT_SHADER);
      context.shaderSource(fragmentShader, `
        uniform lowp vec4 color;

        void main() {
          gl_FragColor = color;
        }
      `);
      context.compileShader(fragmentShader);

      const program = context.createProgram();
      context.attachShader(program, vertexShader);
      context.attachShader(program, fragmentShader);
      context.linkProgram(program);

      const positionAttribute = context.getAttribLocation(program, 'position');

      const colorUniform = context.getUniformLocation(program, 'color');
      const projectionUniform = context.getUniformLocation(program, 'projection');

      function render() {
        // Size the drawing surface to match the actual element (no stretch).
        canvas.height = canvas.clientHeight;
        canvas.width = canvas.clientWidth;

        context.viewport(0, 0, canvas.width, canvas.height);

        context.useProgram(program);

        // Scale projection to maintain 1:1 ratio between height and width on canvas.
        projectionMatrix[0] = canvas.width > canvas.height ? canvas.height / canvas.width : 1.0;
        projectionMatrix[5] = canvas.height > canvas.width ? canvas.width / canvas.height : 1.0;
        context.uniformMatrix4fv(projectionUniform, false, projectionMatrix);

        const vertexSize = 2;
        const vertexCount = positions.length / vertexSize;

        context.bindBuffer(context.ARRAY_BUFFER, positionBuffer);
        context.vertexAttribPointer(positionAttribute, vertexSize, context.FLOAT, false, 0, 0);
        context.enableVertexAttribArray(positionAttribute);

        context.uniform4fv(colorUniform, redColor);
        context.drawArrays(context.TRIANGLE_FAN, 0, vertexCount);

        context.uniform4fv(colorUniform, blackColor);
        context.drawArrays(context.LINE_STRIP, 1, vertexCount - 1);
      }

      render();
      addEventListener("resize", render);
    </script>
  </body>
</html>
http://localhost:8000/indexwebgl.html
使用大杀器——x3d
<html style="height: 100%; width: 100%">
  <head>
    <script type="text/javascript" src="http://www.x3dom.org/release/x3dom-full.js"></script>
    <link rel="stylesheet" type="text/css" href="http://www.x3dom.org/release/x3dom.css">
    <style>x3d > canvas { display: block; }</style>
  </head>
  <body style="height: 100%; width: 100%; margin: 0px">
    <x3d style="height: 100%; width: 100%">
      <scene>
        <orthoviewpoint></orthoviewpoint>
        <shape>
          <appearance>
            <material diffuseColor="1 0 0"></material>
          </appearance>
          <disk2d outerRadius="0.5"></disk2d>
        </shape>
        <shape>
          <appearance>
            <material emissiveColor="0 0 0"></material>
          </appearance>
          <circle2d radius="0.5"></circle2d>
        </shape>
      </scene>
    </x3d>
  </body>
</html>
http://localhost:8000/webgl-easy.html
什么是x3d
X3D 是表示 3D 模型的 ISO 标准,是虚拟现实建模语言(VRML)的后续标准。是VRML的超集,它可以表示为各种编码,包括 JSON 和 XML。后者特别适合嵌入到 HTML 文档中。它由 Web3D 联盟维护,他们希望它能像 SVG 一样在 HTML5 中得到原生支持。
为啥要关注它:
- 很多资源免费,并且多个工具都支持导出此格式,例如blendar就可以导出.x3d格式的文件
- 是目前唯一一个通过网络进行展示和交付3D模型的国际标准。
- 可以集成到多环境
In Web
X3DOM 是一个在web上的3D图形的运行时开源框架,可以支持x3d标准,并努力发展成为HTML5标准。
关于x3dom的定位:
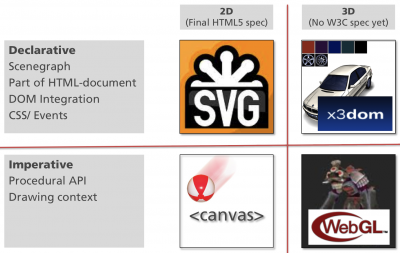
目前x3dom 与 x3d
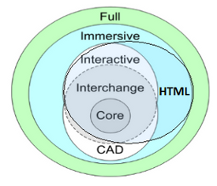
先看一个简单的例子:实现一个运动的3D小球
http://localhost:8000/animateBall.html
<html>
    <head>
        <meta http-equiv="X-UA-Compatible" content="IE=edge"/>
        <title>X3Dom Example OnOutputChange Event</title>
        <script type='text/javascript' src='https://x3dom.org/release/x3dom.js'> </script>
        <link rel='stylesheet' type='text/css' href='https://www.x3dom.org/download/x3dom.css'/>


      <script>
      /**
       * Uses the values of a PositionInterpolator to move another ball,
       * but instead of just routing the values, round the y component.
       * Thus the second ball moves like he is snapping to an invisible raster
       */
      function snapBall(eventObject)
      {
        //Check if type and output of the eventObject are correct
        //There may be multiple eventObjects but only one of them contains the value we need
        if(eventObject.type != "outputchange" || eventObject.fieldName != "value_changed")
          return;

        //Get the value...
        var value = eventObject.value;
        //...and create a copy with the manipulated coordinates
        var newPos = new x3dom.fields.SFVec3f(2, Math.round(value.y), 0);

        //Set the newly created array as new position for the second ball
        document.getElementById("ball2").setAttribute('translation', newPos.toString());

        //Show debug information (of course the data can be used to control non x3dom-objects, too)
        document.getElementById("posInterp").innerHTML = Math.round(value.y*100)/100;
        document.getElementById("posSnaped").innerHTML = newPos.y;
      }
      </script>

    </head>
    <body>

    <h1>Animate Objects with X3DOM!</h1>

    <x3d width='500px' height='400px'>
        <scene>
            <transform DEF="ball" translation='-2 0 0'>
            <shape>
                <appearance>
                    <material diffuseColor='1 0 0'></material>
                </appearance>
                <sphere></sphere>
            </shape>
            </transform>

            <transform DEF="ball2" translation='2 0 0' id="ball2">
            <shape>
                <appearance>
                    <material diffuseColor='0 0 1'></material>
                </appearance>
                <sphere></sphere>
            </shape>
            </transform>

            <timeSensor DEF="time" cycleInterval="4" loop="true"></timeSensor>
            <PositionInterpolator DEF="move" key="0 0.5 1" keyValue="-2 -2.5 0  -2 2.5 0  -2 -2.5 0" onoutputchange="snapBall(event)"></PositionInterpolator>

            <Route fromNode="time" fromField ="fraction_changed" toNode="move" toField="set_fraction"></Route>
            <Route fromNode="move" fromField ="value_changed" toNode="ball" toField="translation"></Route>
        </scene>
    </x3d>


    </body>
    </html>
复杂一点的🌰
http://localhost:8000/hello-world.html
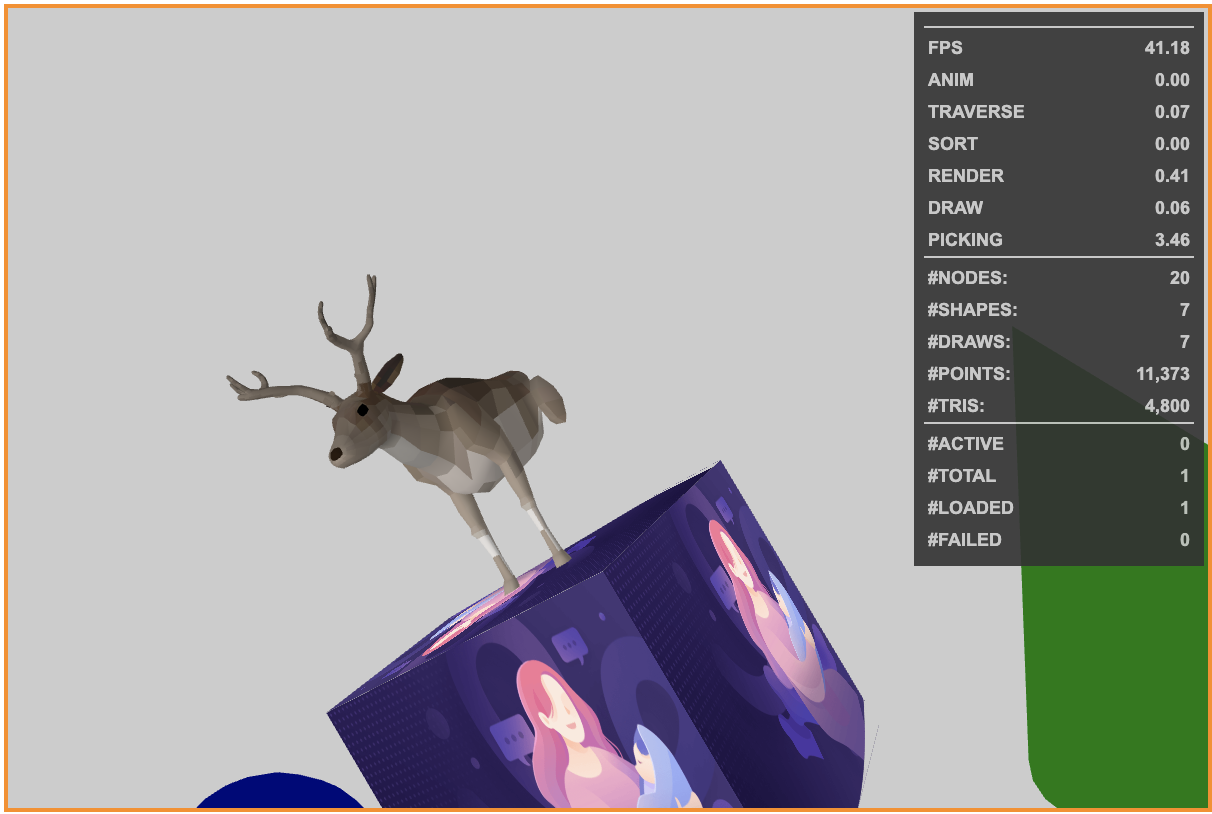
<html>

<head>
  <title>My first X3DOM page</title>
  <script type='text/javascript' src='http://www.x3dom.org/download/x3dom.js'> </script>
  <link rel='stylesheet' type='text/css' href='http://www.x3dom.org/download/x3dom.css'>
  </link>
  <style>
    x3d {
      border: 2px solid darkorange;
    }
  </style>
  <script>
      function redNose()
      {
          if(document.getElementById('Deer__MA_Nose').getAttribute('diffuseColor')!= '1 0 0')
              document.getElementById('Deer__MA_Nose').setAttribute('diffuseColor', '1 0 0');
          else
              document.getElementById('Deer__MA_Nose').setAttribute('diffuseColor', '0 0 0');
      }
  </script>
</head>

<body>
  <x3d width='600px' height='400px' showStat="true">
    <scene>
      <shape>
        <appearance>
          <ImageTexture url="https://img1.dxycdn.com/2019/0916/756/3368546464514541728-2.png">
          <ImageTexture />
        </appearance>
        <box></box>
      </shape>
      <transform translation='-3 0 0'>
        <shape>
          <appearance>
            <material diffuseColor='0 1 0'></material>
          </appearance>
          <cone></cone>
        </shape>
      </transform>
      <transform translation='3 0 0'>
        <shape>
          <appearance>
            <material diffuseColor='0 0 1'></material>
          </appearance>
          <sphere></sphere>
        </shape>
      </transform>
      <transform translation='0 1 0'>
          <inline nameSpaceName="Deer" mapDEFToID="true" onclick='redNose();' url="./Deer.x3d"></inline>
        </transform>
    </scene>
  </x3d>
</body>

</html>
那么首屏那个wow模型是怎么做出来的呢?
- 利用blender导出模型
- 引入模型
- 增加动画
http://localhost:8000/demo-blendar/
上代码:http://localhost:8000/wow/index.xhtml
剩下的精彩,等你自己再深入
3D图表
https://github.com/jamesleesaunders/d3-x3d
一个借助d3和x3d标准实现的3D图库
支持X_ite、x3dom等
<html>

<head>
  <script src="https://d3js.org/d3.v5.min.js"></script>
  <script src="http://x3dom.org/release/x3dom.js"></script>
  <link rel="stylesheet" href="http://x3dom.org/release/x3dom.css" />
  <script src="d3-x3d.js"></script>
</head>

<body>
  <div id="chartholder"></div>
  <script>
    // Select chartholder
    var chartHolder = d3.select("#chartholder");

    // Generate some data
    var myData = [
      {
        key: "c1",
        values: [
          { key: "a", value: 9 },
          { key: "b", value: 3 },
          { key: "c", value: 5 },
          { key: "d", value: 7 }
        ]
      },
      {
        key: "c2",
        values: [
          { key: "a", value: 5 },
          { key: "b", value: 4 },
          { key: "c", value: 6 },
          { key: "d", value: 2 }
        ]
      }
    ];

    // Declare the chart component
    var myChart = d3.x3d.chart.barChartMultiSeries();

    // Attach chart and data to the chartholder
    chartHolder
      .datum(myData)
      .call(myChart);</script>
</body>

</html>
http://localhost:8000/x3d-chart/
