对 Taro3.x 的认知一直停留在强运行时,知道其大致的原理是通过在运行时进行内容的渲染,类似重新编写react-dom的运行时,从而可以完整使用React生态内容,达到在小程序测渲染的目的。
作为一个非常优秀的全面的开源项目,了解其中的原理不仅仅可以帮助更好的排查小程序开发过程中出现的问题,更多的是学习其中的设计思想。
关于整体的项目结构,可以参考这篇文章,整体结构区别不大,新的项目结构使用pnpm作为memorepo的管理工具。其他关于初始的从 build 到如何使用 kernel 行运行的讲解也已经很多,我们这里重点分析,到底是如何从webpack 构建到真实小程序DSL的。
构建配置
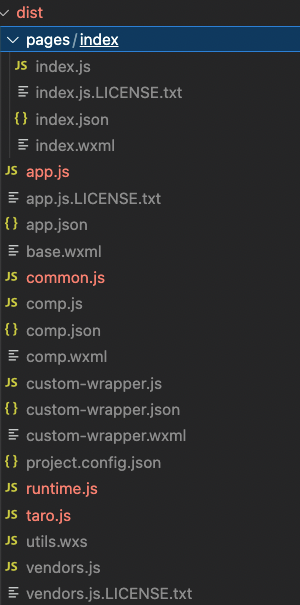
以构建最基本的微信小程序的为例。通过taro-webpack5-runner直接调用webpack进行构建,生成的内容如下,是一个标准的微信小程序的项目
webpack的最终的配置如下,包含了从Taro项目到小程序DSL的完整配置
{
  target: [ 'web', 'es5' ],
  watchOptions: { aggregateTimeout: 200 },
  mode: 'production',
  devtool: false,
  output: {
    chunkLoadingGlobal: 'webpackJsonp',
    path: '/Users/github/taro/examples/TestBuild/dist',
    publicPath: '/',
    filename: '[name].js',
    chunkFilename: '[name].js',
    globalObject: 'wx',
    enabledLibraryTypes: [],
    devtoolModuleFilenameTemplate: [Function (anonymous)]
  },
  resolve: {
    symlinks: true,
    fallback: { fs: false, path: false },
    alias: {
      'regenerator-runtime': '/Users/github/taro/node_modules/.pnpm/registry.npmjs.org+regenerator-runtime@0.11.1/node_modules/regenerator-runtime/runtime-module.js',
      '@tarojs/runtime': '/Users/github/taro/packages/taro-runtime/dist/runtime.esm.js',
      '@tarojs/shared': '/Users/github/taro/packages/shared/dist/shared.esm.js',
      '@tarojs/components$': '@tarojs/plugin-platform-weapp/dist/components-react',
      'react-dom$': '@tarojs/react'
    },
    extensions: [ '.js', '.jsx', '.ts', '.tsx', '.mjs', '.vue' ],
    mainFields: [ 'browser', 'module', 'jsnext:main', 'main' ],
    plugins: [ [MultiPlatformPlugin] ]
  },
  resolveLoader: { modules: [ 'node_modules' ] },
  module: {
    rules: [
    { test: /\.sass$/, oneOf: [Array] },
    { test: /\.scss$/, oneOf: [Array] },
    { test: /\.less$/, oneOf: [Array] },
    { test: /\.styl(us)?$/, oneOf: [Array] },
    { test: /\.(css|wxss|acss|ttss)(\?.*)?$/, oneOf: [Array] },
    { test: /\.[tj]sx?$/i, exclude: [Array], use: [Array] },
    {
      test: /\.(wxml|axml|ttml|qml|swan|jxml)(\?.*)?$/,
      type: 'asset/resource',
      generator: [Object],
      use: [Array]
    },
    {
      test: /\.(mp4|webm|ogg|mp3|m4a|wav|flac|aac)(\?.*)?$/,
      type: 'asset',
      parser: [Object],
      generator: [Object]
    },
    {
      test: /\.(woff2?|eot|ttf|otf)(\?.*)?$/,
      type: 'asset',
      parser: [Object],
      generator: [Object]
    },
    {
      test: /\.(png|jpe?g|gif|bpm|svg|webp)(\?.*)?$/,
      type: 'asset',
      parser: [Object],
      generator: [Object]
    }
  ]
  },
  optimization: {
    sideEffects: true,
    minimize: true,
    usedExports: true,
    runtimeChunk: { name: 'runtime' },
    splitChunks: {
      chunks: 'all',
      maxInitialRequests: Infinity,
      minSize: 0,
      cacheGroups: [Object]
    },
    minimizer: [ [TerserPlugin], [CssMinimizerPlugin] ]
  },
  plugins: [
    TaroWebpackBarPlugin {
      profile: false,
      handler: [Function (anonymous)],
      modulesCount: 5000,
      dependenciesCount: 10000,
      showEntries: true,
      showModules: true,
      showDependencies: true,
      showActiveModules: true,
      percentBy: undefined,
      options: [Object],
      reporters: [Array]
    },
    ProvidePlugin { definitions: [Object] },
    DefinePlugin { definitions: [Object] },
    MiniCssExtractPlugin {
      _sortedModulesCache: [WeakMap],
      options: [Object],
      runtimeOptions: [Object]
    },
    MiniSplitChunksPlugin {
      options: [Object],
      _cacheGroupCache: [WeakMap],
      tryAsync: [Function (anonymous)],
      subCommonDeps: Map(0) {},
      subCommonChunks: Map(0) {},
      subPackagesVendors: Map(0) {},
      distPath: '',
      exclude: [],
      fileType: [Object]
    },
    TaroMiniPlugin {
      filesConfig: {},
      isWatch: false,
      pages: Set(0) {},
      components: Set(0) {},
      tabBarIcons: Set(0) {},
      dependencies: Map(0) {},
      pageLoaderName: '@tarojs/taro-loader/lib/page',
      independentPackages: Map(0) {},
      options: [Object],
      prerenderPages: Set(0) {}
    }
  ],
  performance: { maxEntrypointSize: 2000000 },
  entry: {
    app: [ '/Users/github/taro/examples/TestBuild/src/app.ts' ]
  }
}
从上述的结构中的入口配置我们看到入口文件是src/app.ts,生成目录果然存在此文件dist/app.js,大致长这个样子
require('./common'),
  require('./vendors'),
  require('./taro'),
  require('./runtime'),
  (wx['webpackJsonp'] = wx['webpackJsonp'] || []).push([
    [143],
    {
      876: function (e, n, t) {
        var r = t(548)['default']
        e.exports = function (e)
文件头部引入的chunk配置在MiniCombination.ts文件中
getOptimization () {
    const chunkPrefix = this.isBuildPlugin ? this.buildNativePlugin.chunkPrefix : ''

    return {
      usedExports: true,
      runtimeChunk: {
        name: `${chunkPrefix}runtime`
      },
      splitChunks: {
        chunks: 'all',
        maxInitialRequests: Infinity,
        minSize: 0,
        cacheGroups: {
          default: false,
          defaultVendors: false,
          common: {
            name: `${chunkPrefix}common`,
            minChunks: 2,
            priority: 1
          },
          vendors: {
            name: `${chunkPrefix}vendors`,
            minChunks: 2,
            test: module => /[\\/]node_modules[\\/]/.test(module.resource),
            priority: 10
          },
          taro: {
            name: `${chunkPrefix}taro`,
            test: module => /@tarojs[\\/][a-z]+/.test(module.context),
            priority: 100
          }
        }
      }
    }
  }
我们再看入口文件,对于简单的基础应用,src/app.ts内容如下
import { Component, PropsWithChildren } from 'react'
// import './app.less'

class App extends Component<PropsWithChildren> {

  componentDidMount () {}

  componentDidShow () {}

  componentDidHide () {}

  render () {
    // this.props.children 是将要会渲染的页面
    return this.props.children
  }
}

export default App
内容如此简单怎么会在构建的时候生成那么多内容,其中竟然还有那么的chunk,这不科学啊,最起码taro Chunk不应该存在啊,入口并没有引用@tarojs相关的包。
其中一个原因是因为在alias下 react-dom:@tarojs/react ,这里就是大部分都知道的tarojs的运行时的核心原理。对运行时进行平替
react-dom -> @tarojs/react
window/dom等 -> @tarojs/runtime
关于@tarojs/react 通过 Reconciler 进行替换react-dom的原理整体倒也不是很复杂,感兴趣的可以研究下react-reconciler。
在运行时核心替代的对象如下(关于运行时的具体内容这里先跳过,先按照编译时的思路走):
    window: ['@tarojs/runtime', 'window'],
    document: ['@tarojs/runtime', 'document'],
    navigator: ['@tarojs/runtime', 'navigator'],
    requestAnimationFrame: ['@tarojs/runtime', 'requestAnimationFrame'],
    cancelAnimationFrame: ['@tarojs/runtime', 'cancelAnimationFrame'],
    Element: ['@tarojs/runtime', 'TaroElement'],
    SVGElement: ['@tarojs/runtime', 'SVGElement'],
    MutationObserver: ['@tarojs/runtime', 'MutationObserver']
在生成内容的根目录下,还有几个额外几个不明文件(runtime.js、vendors.js、taro.js、common.js),显然这是一个个chunk,具体的规则如下
runtime.js: 运行时chunk,在入口文件引入
vendor.js:node_modules相关包
taro.js: @tarojs/xxx相关包
关于MiniPlugin
到这里,会不会有这样的疑问,入口文件命名只有一个,而我们的页面是有多个的,那这里没有啊,那是如何对页面打包的,是配置不全?
配置是完整的,那只能是插件的操作,答案就在MiniPlugin(在taro-webpack5-runner目录下):
this.appConfig = this.getAppConfig()
this.getPages()
this.getPagesConfig()
this.getDarkMode()
this.getConfigFiles(compiler)
this.addEntries()
这里的appConfig就是在配置文件中定义的页面目录、组件目录等,同时新增或修改 app、模板组件、页面、组件等资源模块。
似乎还有文件没有生成出来啊,页面模块文件,页面配置文件等文件都没有生成的入口呢?
答案依然咋MiniPlugin
generateTemplateFile (compilation: Compilation, filePath: string, templateFn: (...args) => string, ...options) {
    let templStr = templateFn(...options)
    const fileTemplName = this.getTemplatePath(this.getComponentName(filePath))

    if (this.options.minifyXML?.collapseWhitespace) {
      const minify = require('html-minifier').minify
      templStr = minify(templStr, {
        collapseWhitespace: true,
        keepClosingSlash: true
      })
    }

    compilation.assets[fileTemplName] = new RawSource(templStr)
  }
generateConfigFile (compilation: Compilation, filePath: string, config: Config & { component?: boolean }) {
    const fileConfigName = this.getConfigPath(this.getComponentName(filePath))
    const unOfficalConfigs = ['enableShareAppMessage', 'enableShareTimeline', 'components']
    unOfficalConfigs.forEach(item => {
      delete config[item]
    })
    const fileConfigStr = JSON.stringify(config)
    compilation.assets[fileConfigName] = new RawSource(fileConfigStr)
  }
分别用于生成视图文件和配置文件。目前的整体流程还是React作用域里,如何从这个DSL到小程序项目结构呢?在解析具体入口类型的时候,通过插件插入loader@tarojs/taro-loader,主要类型有:
    ENTRY = "ENTRY",
    PAGE = "PAGE",
    COMPONENT = "COMPONENT",
    NORMAL = "NORMAL",
    STATIC = "STATIC",
    CONFIG = "CONFIG",
    EXPORTS = "EXPORTS"
例如这里PAGE就是小程序应用的入口文件,其对应的生成的代码
`import { createPageConfig } from '@tarojs/runtime'
import component from ${stringify(componentPath)}
var config = ${configString};
${config.enableShareTimeline ? 'component.enableShareTimeline = true' : ''}
${config.enableShareAppMessage ? 'component.enableShareAppMessage = true' : ''}
${instantiatePage}
${options.prerender ? prerender : ''}
${hmr}
`
到这里是不是看到小程序页面的影子了。
编辑的总体流程基本就是这样,里边还有很多细节,在某个环节用到,针对性进去寻找就可以了。
运行时
以上完成了基本的编译流程,那小程序是怎样一步步调用到我们的React组建内部的呢,答案在@tarojs/runtime
在编译最后,我们看到最终调用了一个createPageConfig生成小程序对象。这个对象就包含应用的生命周期,例如onLoad、onReady等等。
在onLoad阶段,根据路径找到相应的节点(TaroRootElement),这里的节点是自行实现的一个对象。然后将对象的ctx设置为当前小程序的实例,剩下的就是执行组建逻辑,同时将页面数据设置到data中,通过模板进行渲染。之所以人们会诟病Taro的性能,大致就在这里,天然的会导致同步的数据增大。
至此大概梳理了下Taro的整体原理,碰到具体问题可以针对性的在进入具体模块分析。